 University of Utah
Overview
This guide shows how to install Internet Information Services (IIS) on Windows 11 Pro, test IIS by itself, and then add PHP as a separate layer through FastCGI. The recommended workflow is to prove that IIS works first, then configure PHP only after http://localhost is working.
Important Notes
- The IIS web server can only be installed on Windows platform computers.
- Also, IIS cannot be installed on Windows Home Editions, you must have (or upgrade to) Windows Pro Version 10 or 11 in order to install and use IIS.
Requirements
- Windows 11 Pro Edition.
- Note: You must have the Pro edition of Windows in order to add the IIS web server. IIS will not install on the Windows Home Edition.
- Administrator access to the computer.
- A web browser to test the installation of IIS and PHP.
- Internet access.
Phase 1: Install and Test IIS
In this first phase, we'll install the IIS web server and confirm that the default IIS site works first, then in Phase II we'll add PHP to the web server.
Step 1.1: Add IIS to the Windows Installation
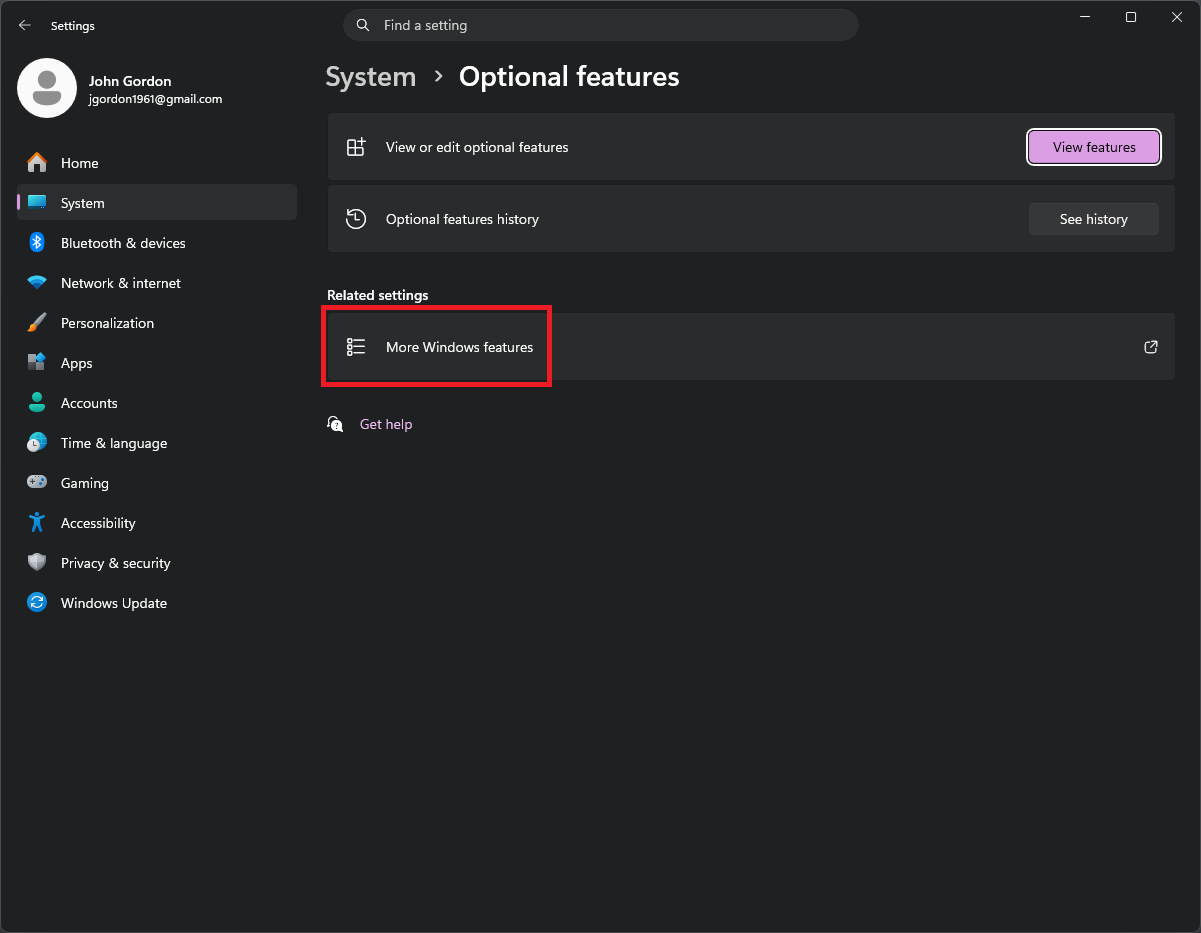
Use the Windows Search box and enter: optional features.
Then, on the dialog click More Windows Features as shown in Figure 1.
The Windows Features dialog opens.
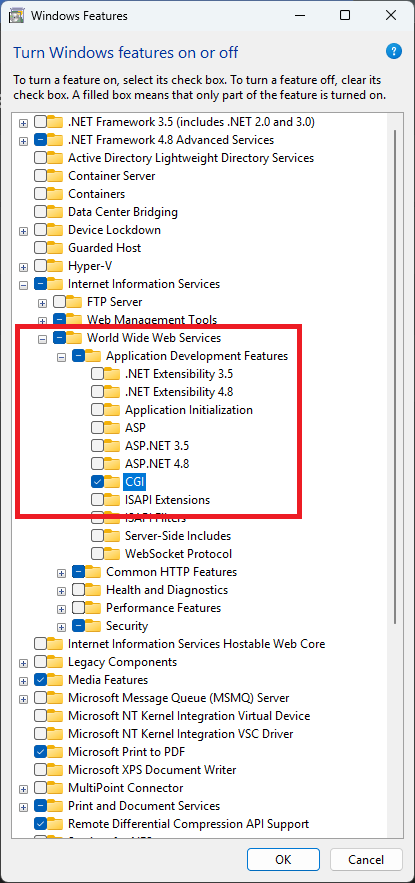
Expand the Internet Information Services list and check the boxes shown in Figure 2. below.
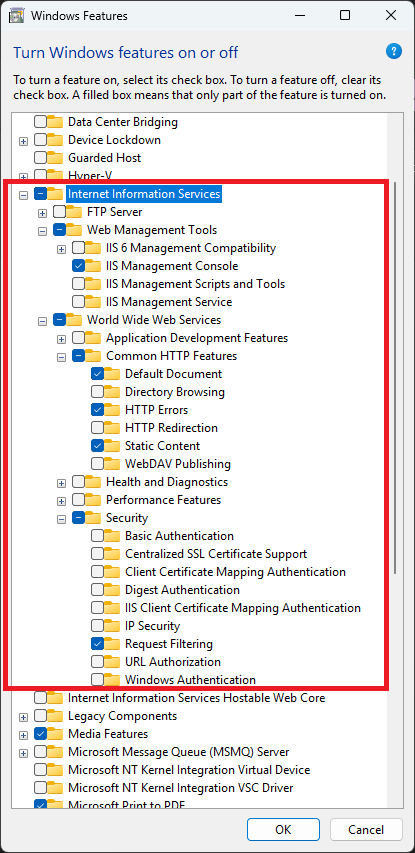
When finished you should have the following items checked:
- Internet Information Services
- Web Management Tools
- IIS Management Console
- World Wide Web Services
- Common HTTP Features
- Default Document
- HTTP Errors
- Static Content
- Security
- Request Filtering
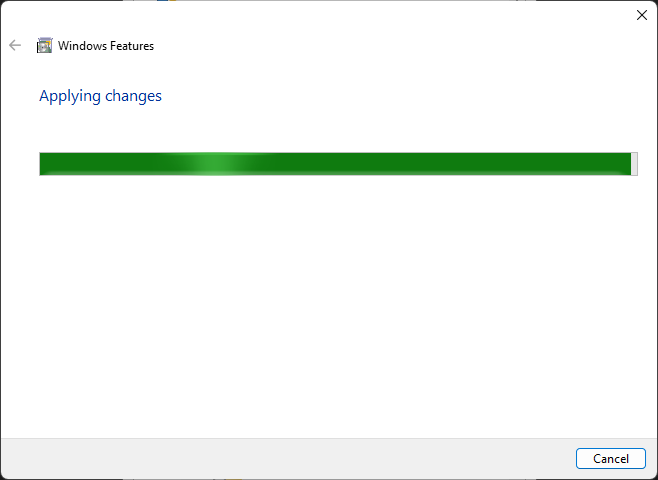
Click Ok and the features are installed.

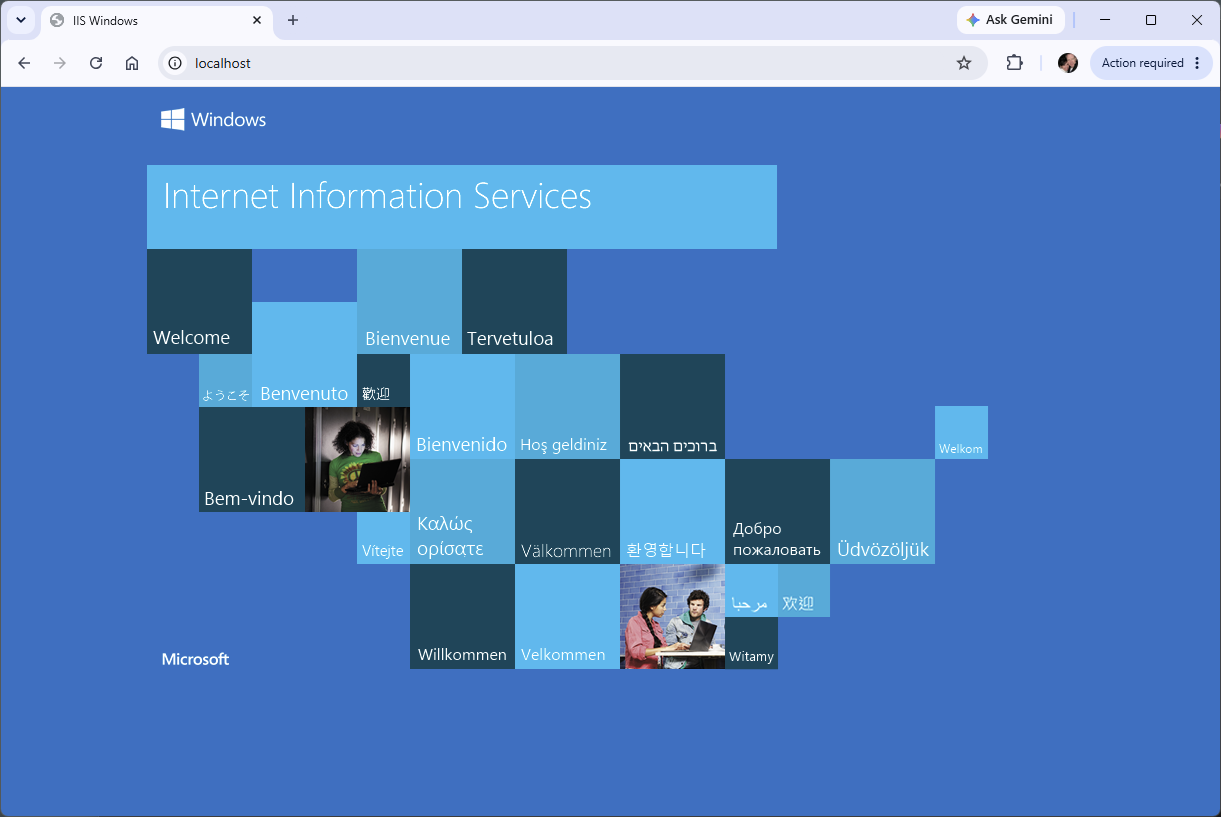
Step 1.2: Test IIS
After the feature installation completes, open a browser and enter the following in the URL address bar: localhost and press Enter.
Phase 2: Add PHP to IIS
Now that IIS is installed and working, next we'll add the PHP language and service to the web server so that it will process PHP pages and code. The instructions below are a bit lengthy and very specific, read and follow them carefully to ensure this works.
Step 2.1: Add the CGI Feature to IIS
Go back to the Windows Search box again and enter: optional features.
Then, on the dialog click More Windows Features.
Expand the Internet Information Services list and check the boxes shown in Figure 4. below.
When finished you should have the following items checked:
- Internet Information Services
- CGI
Click OK. The CGI CGI feature adds FastCGI support for PHP in IIS.
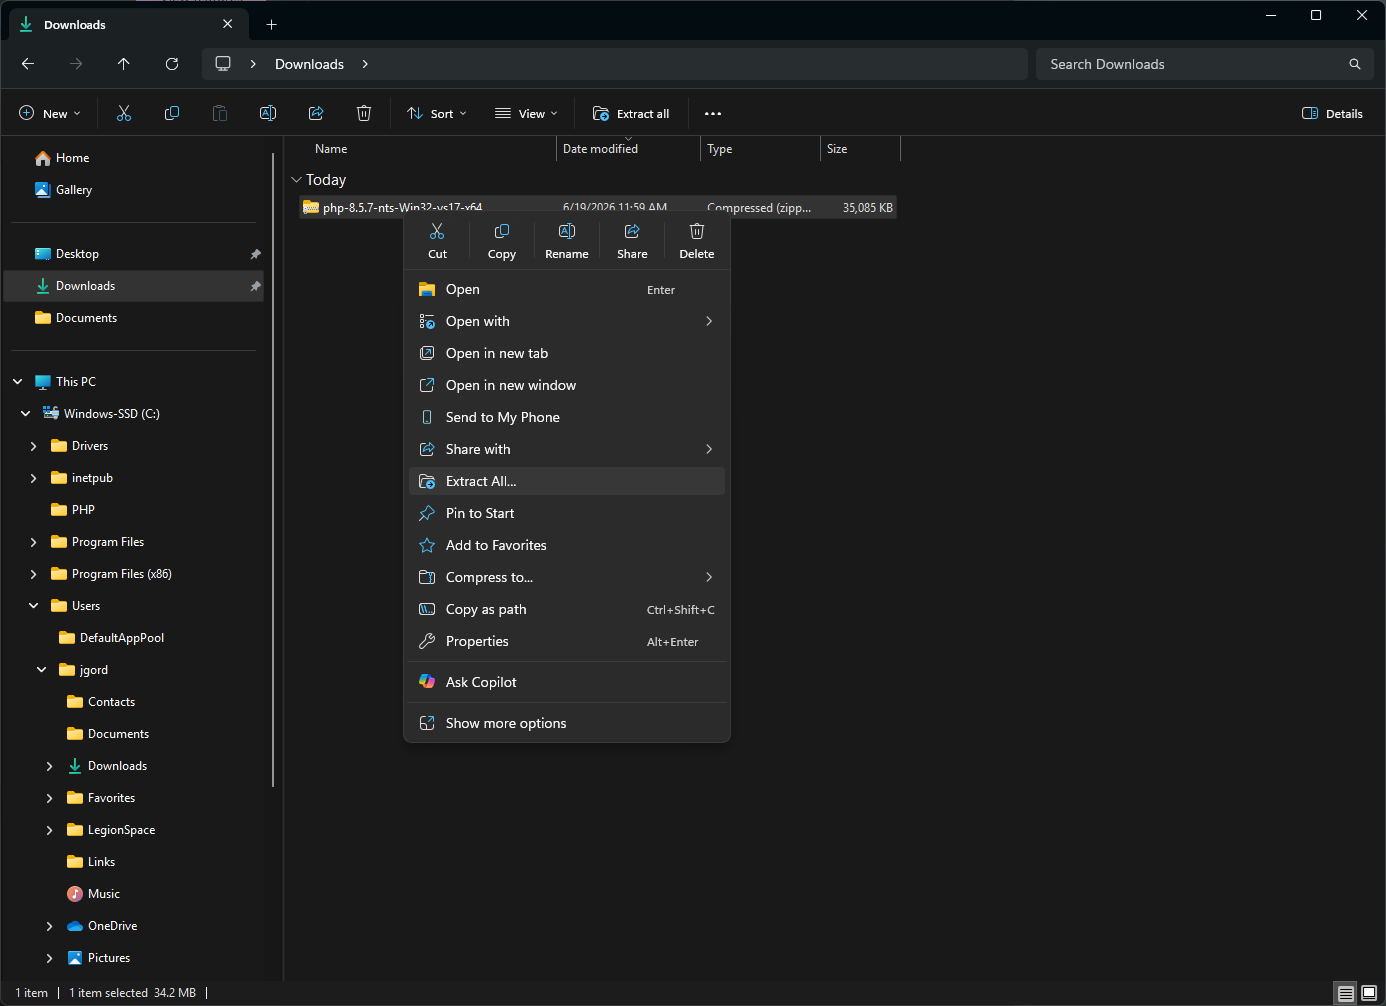
Step 2.2: Download PHP for Windows
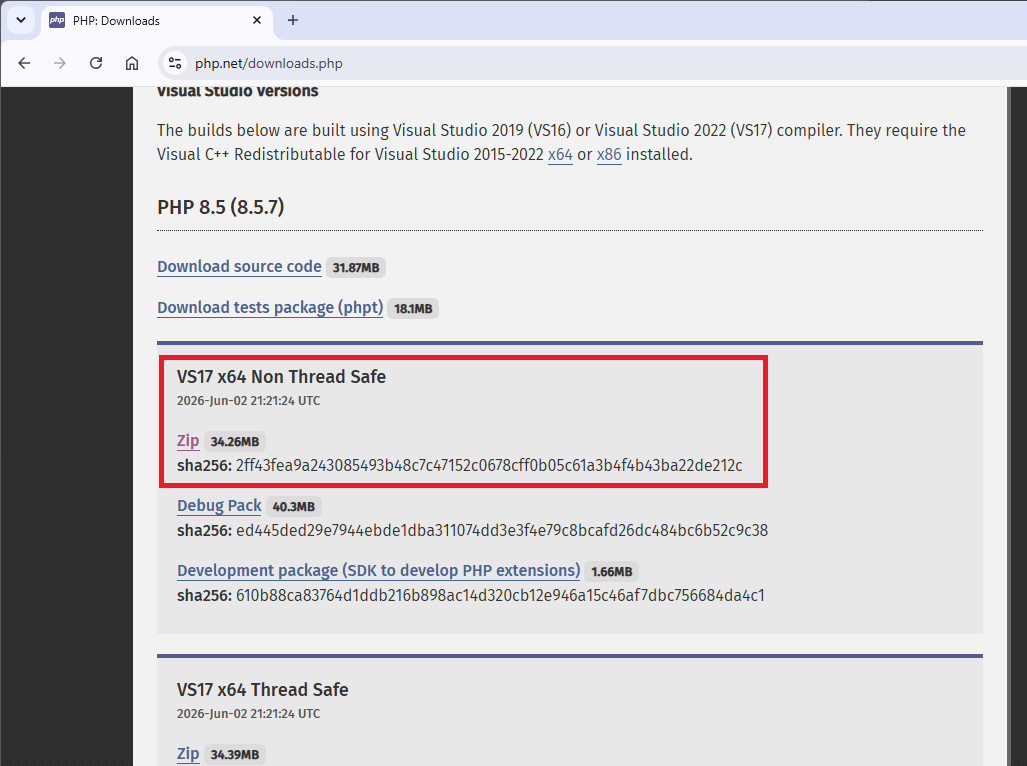
Next you will download the PHP language installation file. It is very important that you choose the correct file from the download site (shown below).
Very Important: Choose the download with the following characteristics:
- x64
- Non Thread Safe
- ZIP package
In your browser go to this URL: https://www.php.net/downloads.php and download PHP from the official PHP Windows downloads page as shown in Figure 9.
The file name you want to download should look something like this: php-8.x.x-nts-Win32-vs17-x64.zip. The version number(s) in the file name may be different, which is ok as long as you choose the correct one based on the list of characteristics above.
Caution: Do not use the Thread Safe version for IIS FastCGI.
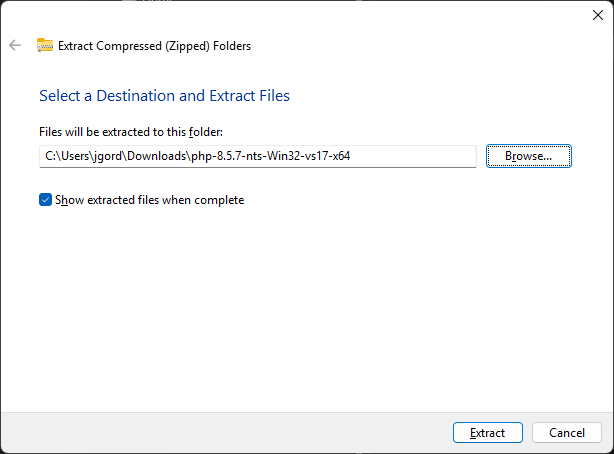
Step 2.3: Extract PHP
Next, create this folder on you computer: C:\PHP
Extract the PHP ZIP contents into that folder.

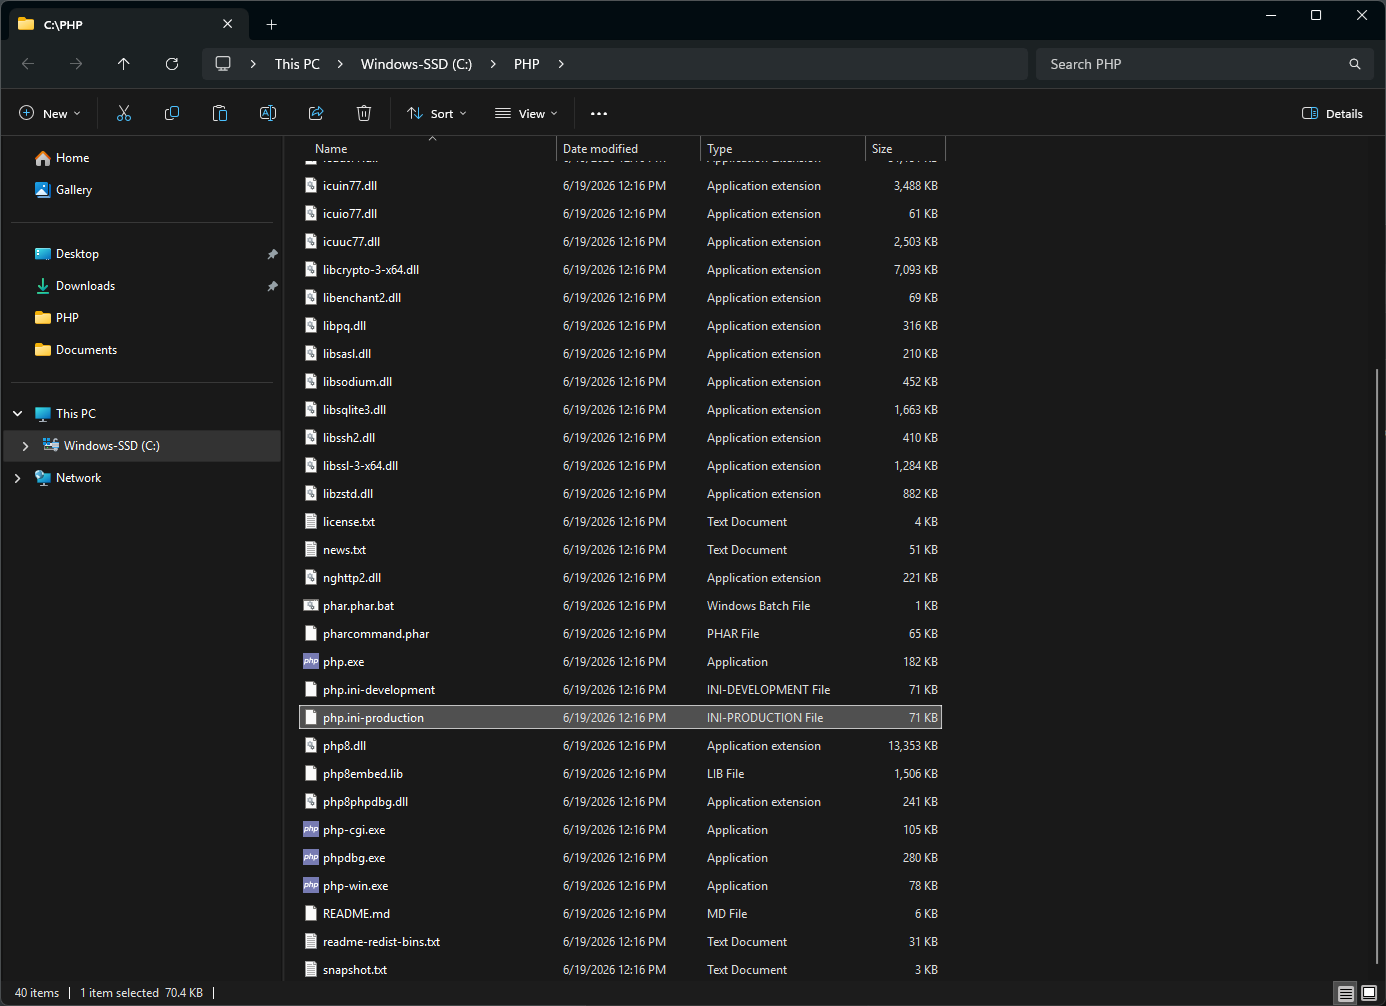
You should end up with files and folders like these in the PHP folder:
- C:\PHP\php.exe
- C:\PHP\php-cgi.exe
- C:\PHP\ext\
- And others...
Step 2.4: Create php.ini
In Windows Explorer find the file C:\PHP\php.ini-production (Figure 13.).
Copy it and rename the copy to: C:\PHP\php.ini (Figure 14.).
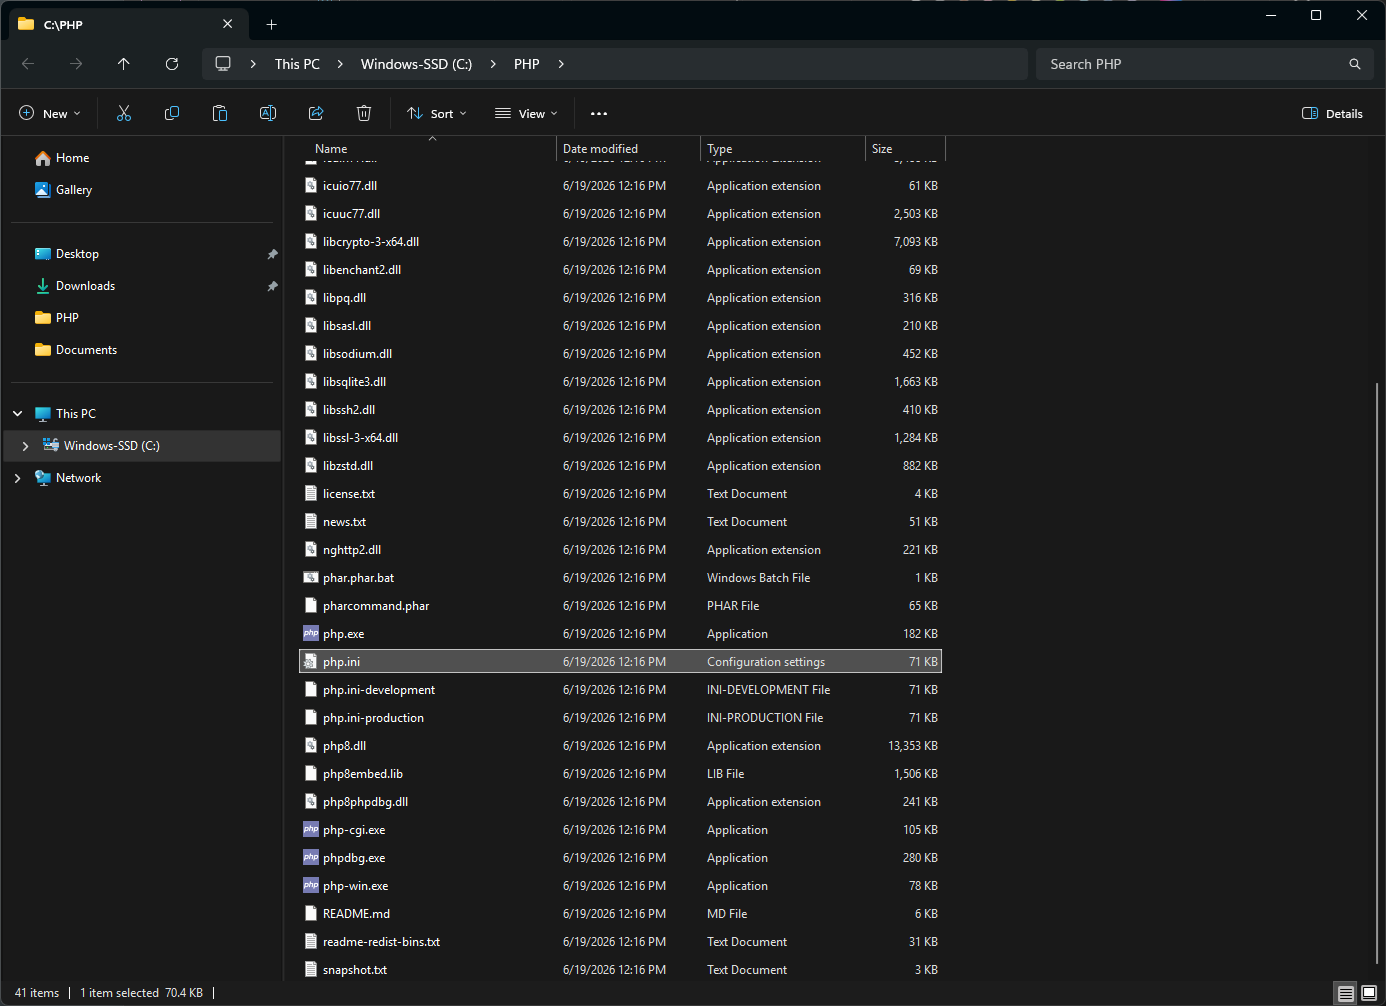
Step 2.5: Edit php.ini
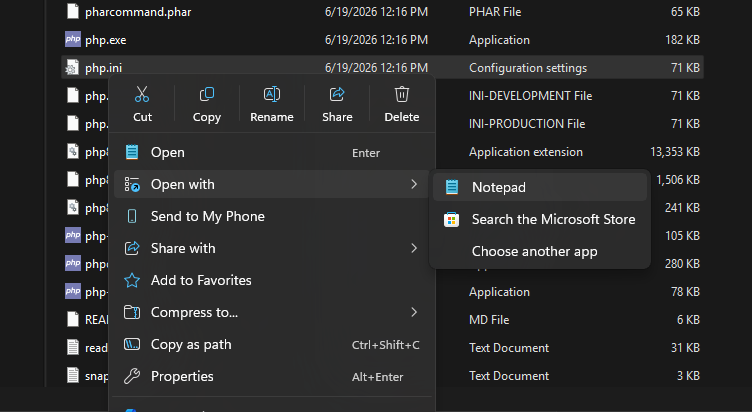
Open your C:\PHP\php.ini file in a text editor (right-click the file name > Open With > Notepad (for example)) (Do not edit the file using Microsoft Word) Figure 15.
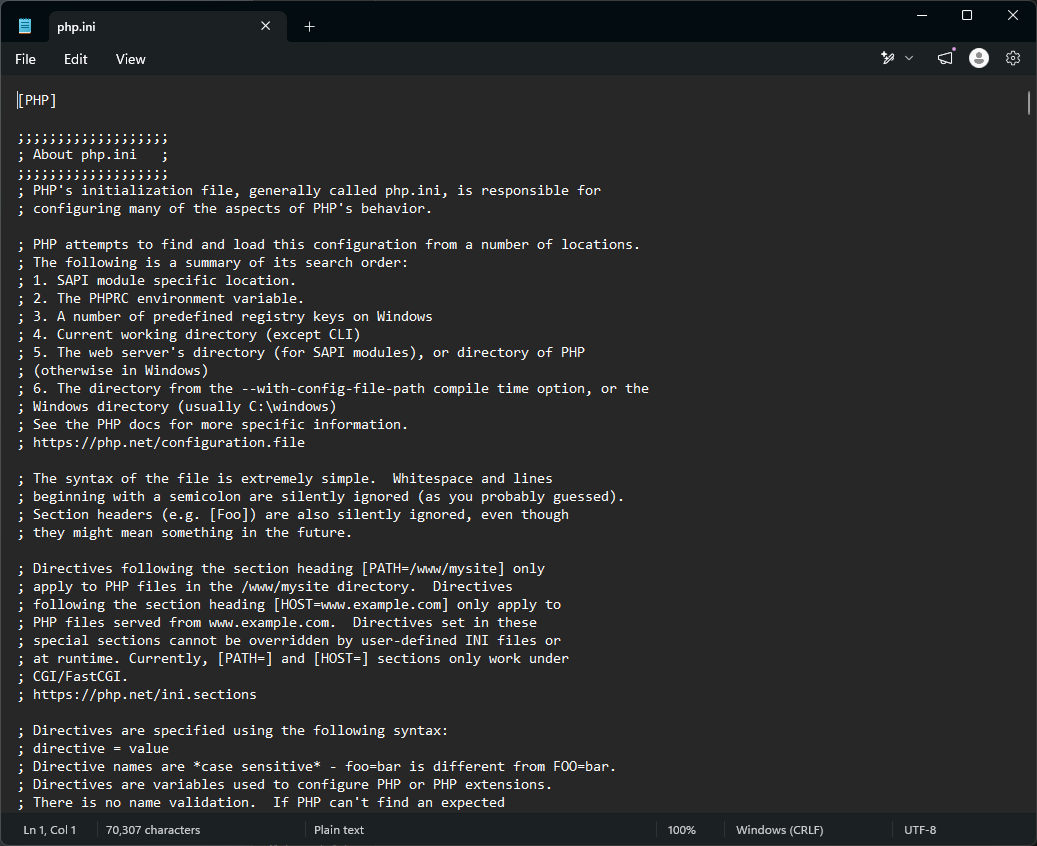
The file will contain many lines of settings (Figure 16.), do not change any of the file's contents except for the following specific changes:
- Use Search and find: cgi.force_redirect
- If there is a # symbol at the beginning of the line, remove it. And, set the line to read cgi.force_redirect = 0
- Use Search and find: cgi.force_redirect
- If there is a # symbol at the beginning of the line, remove it. And, set the line to read cgi.force_redirect = 0
- Use Search and find: cgi.fix_pathinfo
- If there is a # symbol at the beginning of the line, remove it. And, set the line to read cgi.fix_pathinfo = 0
- Use Search and find: fastcgi.impersonate
- If there is a # symbol at the beginning of the line, remove it. And, set the line to read fastcgi.impersonate = 1
- Use Search and find: date.timezone
- If there is a # symbol at the beginning of the line, remove it. And, set the line to read date.timezone = America/Denver
- Next, locate the extensions section (a long list of lines that look like #extension=).
- Then, locate each of the following entries and remove the # symbol from the beginning of the line and set them as follows:
- extension_dir="ext"
- extension=curl
- extension=fileinfo
- extension=gd
- extension=mbstring
- extension=mysqli
- extension=openssl
- extension=pdo_mysql
- extension=zip
- Lastly, Save and Exit the php.ini file.
Step 2.6: Add PHP to the Windows PATH
Next, use Windows Search to search for Path and open the "Edit the System Environment Variables" option (Figure 17.).
And click the Environment Variables button.

Select Path in the System Variables (bottom list) and click the Edit button below that list (Figure 18.):
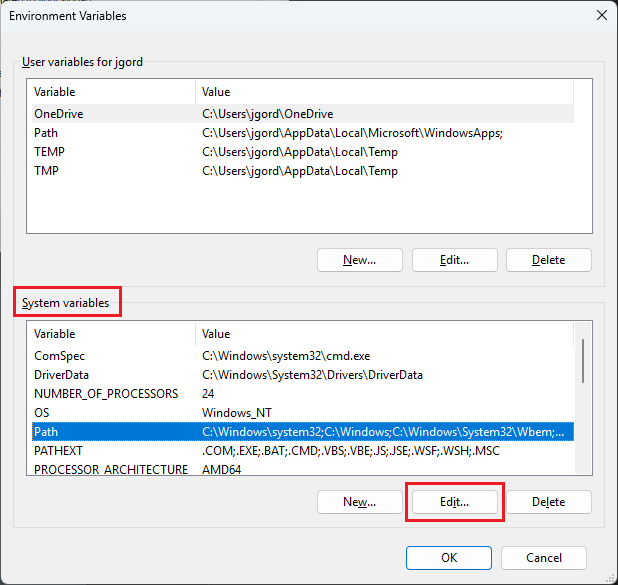
Click the New button (Figure 18.) and enter C:\PHP

Click OK through the dialogs.
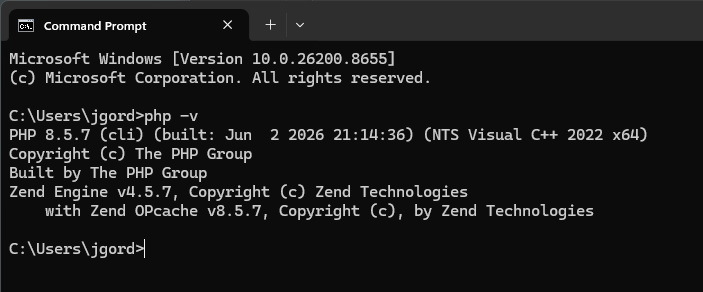
Next, use Windows Search to open a Command Prompt and test that invoking PHP works by entering php -v and pressing Enter. The result should show the PHP version number, similar to Figure 19.
Step 2.7: Configure IIS to Handle PHP Files
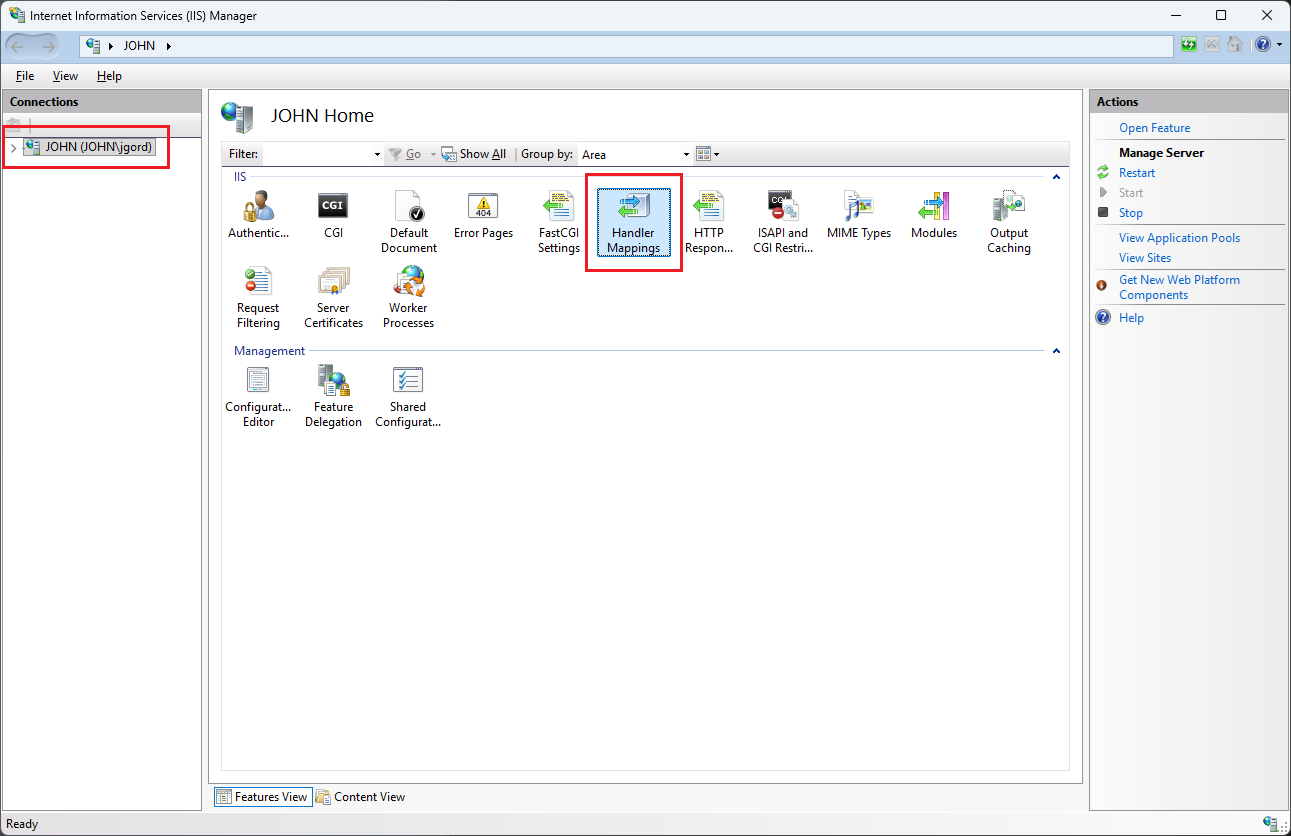
Use windows Search to open the IIS Manager by entering iis in the search bar and pressing Enter. The IIS Manager window will open as shown in Figure 20.
Click the web server name in the left-side Connections pane.
Then click the Handler Mappings icon in the middle pane.
The Module Mapping options will display in the right-side pane as shown in Figure 21.
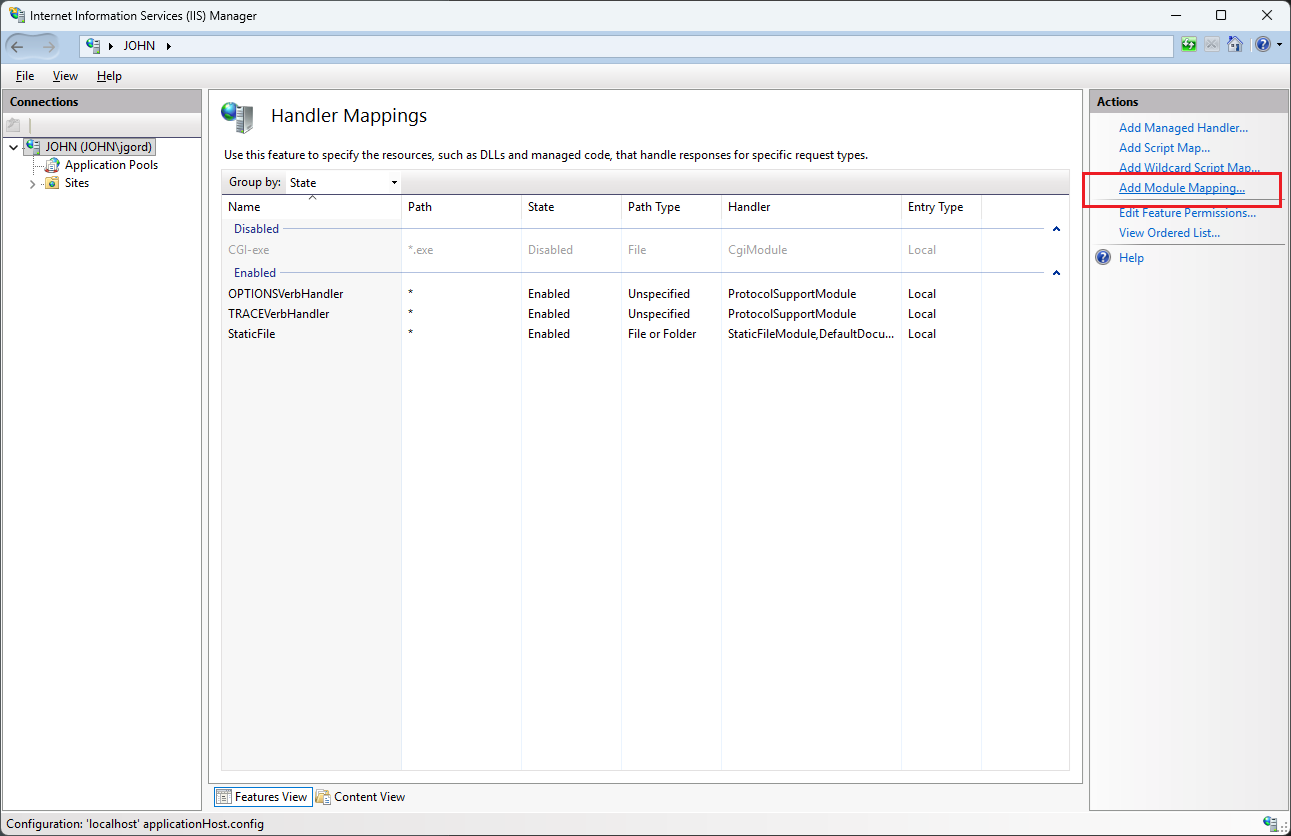
In the right-side panel Actions, click the Add Module Mapping option. The Add Module Mapping dialog will open as shown in Figure 22. Fill in the dialog fields as shown in Figure 22, and as indicated in the table below.
Do not close this dialog after filling in the fields. After the fields are filled in, see the next step after the table below.
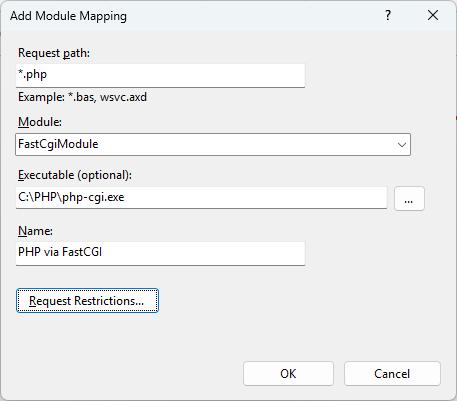
Values for the Add Module Mapping dialog:
| Field | Value |
|---|---|
| Request path | *.php |
| Module | FastCgiModule |
| Executable | C:\PHP\php-cgi.exe |
| Name | PHP via FastCGI |
Next, click Request Restrictions button. The Request Restrictions dialog will open as shown in Figure 23.

On the Mapping tab, choose Invoke handler only if request is mapped to and File or Folder.
Then click OK.
When IIS asks whether to create a FastCGI application for this executable, choose Yes.
Step 2.8: Add index.php as a Default Document
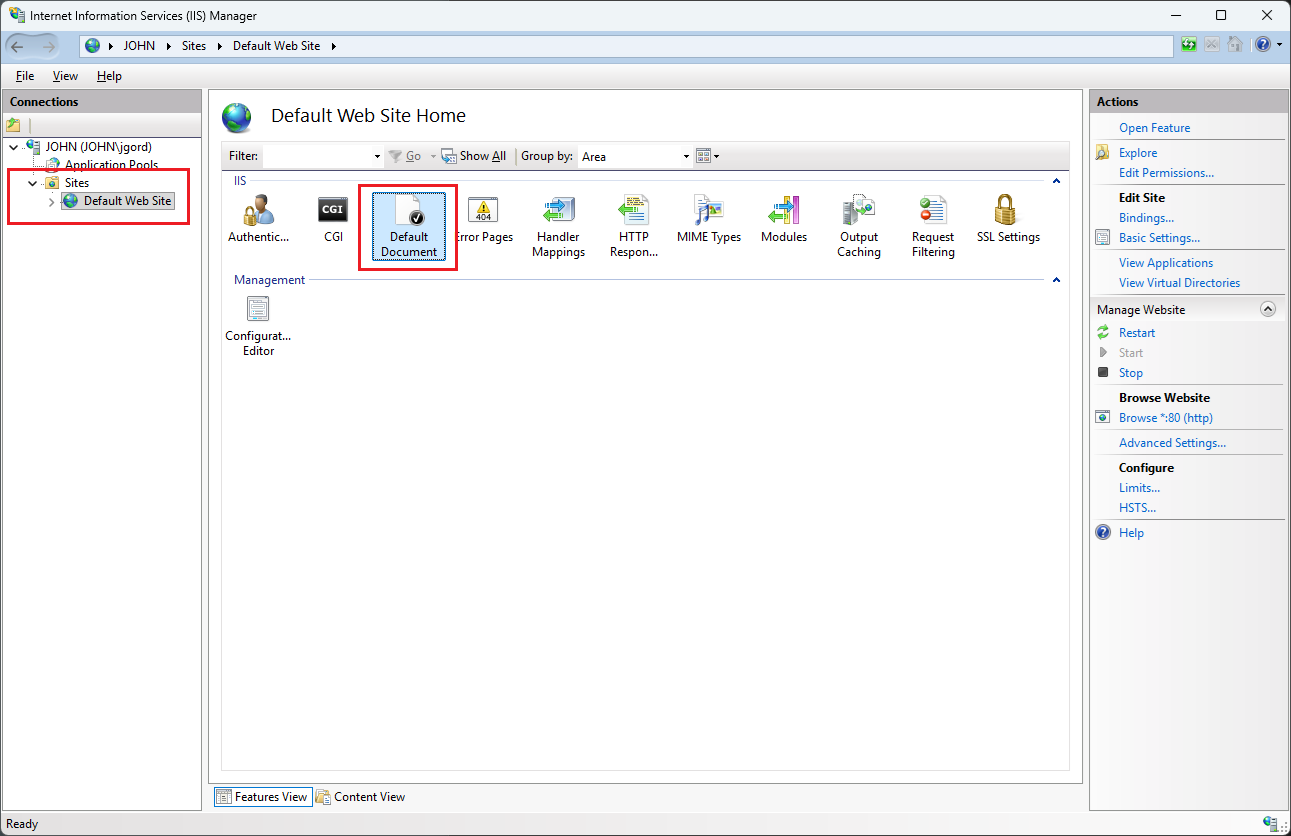
Continuing in the IIS Manager, click Default Web Site in the left-side pane.
Then click the Default Document icon in the middle pane, as shown in Figure 24.
The Default Document panes will open as shown in Figure 25.

Click the Add option in the left-side pane.
The Add Default Document dialog will open as shown in Figure 26.
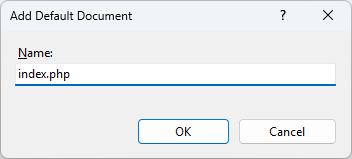
Enter index.php (Note the file extension .php) and then click Ok.
Next, click the index.php item in the list of documents (middle pane) as shown in Figure 27.
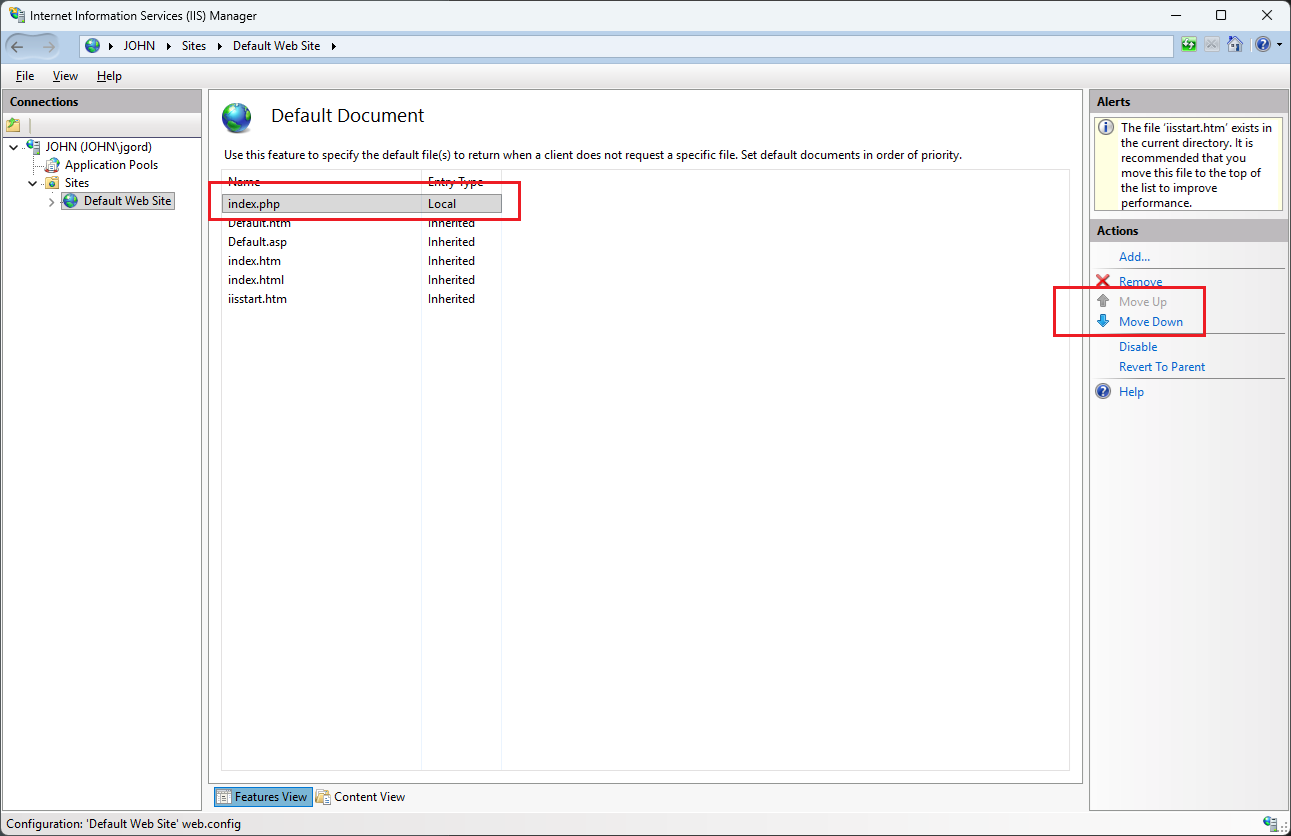
Then use the Move Up option in the right-side pane to move the index.php up to the top of the list. This will put it in first priority for the web server to process.
Lastly, close the IIS Manager window.
Step 2.9: Create a PHP Test Page
Next, open File Manager and navigate to C:\inetpub\wwwroot.
Create a new text file in this folder and name it phpinfo.php.
In the new file enter the following code:
<?php
    phpinfo();
?>
Your file contents should look like Figure 28.
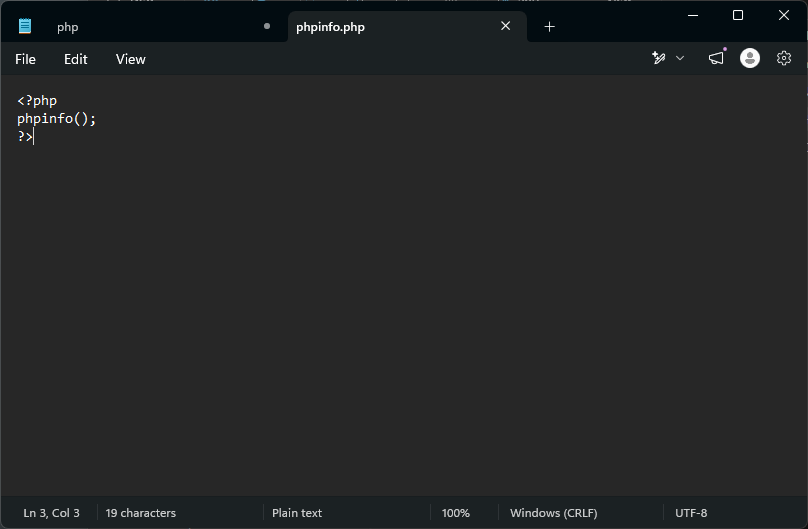
Then Save the file and exit the editor.
Next, open your web browser.
In the URL bar enter http://localhost/index.php
The PHP information page should display, as shown in Figure 29 (the contents of your information page may look a bit different than this example).
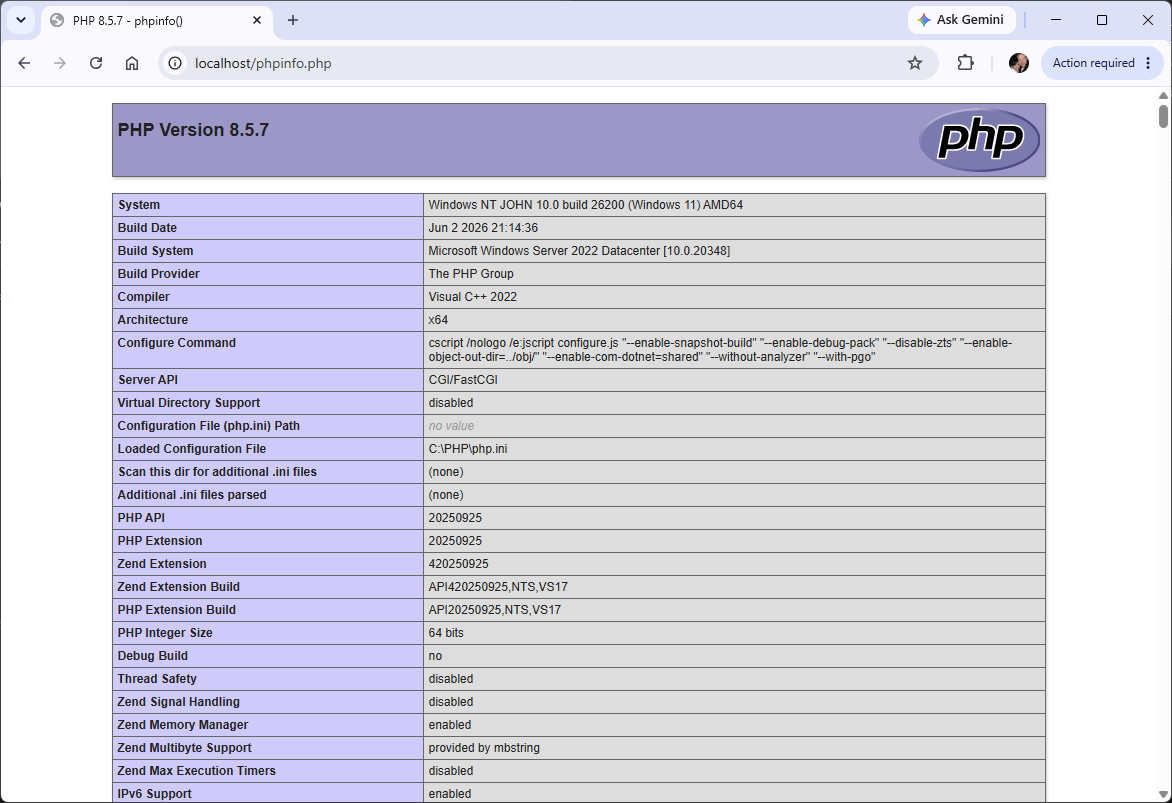
phpinfo() file. It exposes configuration details that should not be left visible on a real server or in code repositories.
Step 2.10: Restart Your Computer
As a last step, restart your computer.
To ensure all settings replicate for future use, after your computer restarts, use your browser again to check that IIS is running (Figure 5.) and that the PHP information page still appears (Figure 29.).
- IIS and PHP are working when
http://localhostshows the IIS site andhttp://localhost/index.phpruns PHP successfully. - Once these are working, any .php file you place in your C:\INETPUB\WWWROOT\ folder, or subfolders of wwwroot, will be recognized and executed as PHP code.